Monday, June 4, 2007

More Welding

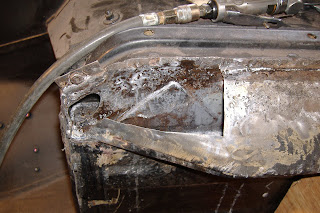
Rust & Hole in front part of the sill


Cut out the front box & fix dent's & rust... re-weld

Thursday, April 5, 2007

Parts etc... & Doglegs

First Order of Parts:

from http://www.lbcarco.com/


Front & Rear Engine Plates. 90%+ Powder Coating is done except for wheels.


Left Dogleg


After cutting out the rust.


Right Dog Leg


After cutting out the rust.

Weld Patch and POR


Monday, April 2, 2007

Black Chrome

Valve Cover in Black Chrome & Clear


SS Chrome with Gun Metal Grey Handle


Black Chrome & Clear


Satin Black Heater Hose & Cannister Plate

Thursday, March 29, 2007

Carb

http://www.mgexperience.net/phorum/read.php?1,568994

Sunday, March 25, 2007

Satin Black

Powder Coat Satin Black Heater Box, Heater Motor Covers, Oil Pan, Engine Blanking Plate, Tappet Covers, Clutch Cover

Paint Heater Control Section with Rustoleum


Chrome Powder Coat Hand Brake & Thermostat Housing


Carbon Canister Bracket

Wednesday, March 14, 2007

More Chrome...

& Mistakes.

Heater Clips, Heat Shield Bracket, Gas Pedal Stop, Timing Cover, Shift Lever Bracket, Steering Wheel Bracket, Thermostat Housing


Brake Master Cylinder

Friday, March 2, 2007

This week's powder coating

Engine Mounts and misc:


Paint Engine Rubber Mounts & Crank Pully (can't powdercoat due to rubber in the pully?)


Coat Gloss Red: Oil Dip Stick & Coil Bracket


Coat Single Stage Chrome

Heat Shield, Gear Shift, Crank Pully Bolt, Cover under tail lights


Pedals

Thursday, March 1, 2007

Steering Wheel

Custom Steering Wheel

Strip Wheel


Blast & Coat with Black Chrome & Clear


But first tried Black Chrome with Gun Metal Gray Inserts... didn't quite work

Wednesday, February 28, 2007

Brake Master Cyclinder Rebuild

Master Cyclinder Rebuild


Drill into the nylon bearing and use screws to pull out.


C-Clamp to hold plunger to remove circlip


Circlips from Autozone that are long enough to reach the 2nd circlip.


Internals of the cyclinder


Pitting at the neck of the cyclinder


Clean & Hone

The cyclinder is small, so I bought the smallest hone from Napa and still had to remove a washer & grind down the body of the hone to fit it all the way into the cyclinder.
Hone from Napa:

http://www.napaonline.com/MasterPages/NOLMaster.aspx?
PageId=470&LineCode=SER&PartNumber=267&Description=Brake+Cylinder+Hone

Powdercoat Columbia All in One Chrome: Need to clearcoat.


How to remove the pin. Slide a nail to hold the spring and punch out (80% of the way) the pin. I used a nail with the tip ground off as a punch.

Tuesday, February 20, 2007

More Powder Coating...

Disassembled and evaluated the following:
Brake Master Cylinder - ok
Clutch Master Cylinder - ok
Clutch Slave - trashed
Fuel Pump - ok but will replace
Carb's - ok

Coat (Flat Black)
-Brake Drums
-Master Cylinder Bracket
-Alternator Bracket
-Fuel Pump Bracket
-Front Axel Dust Covers (Red)


Coat Brake Drums & Turned


Ordered coating from http://columbiacoatings.com/

Going to use Black Chrome/Gun Metal Grey & Single Stage Chrome along with a clear

Flat Black
- Bumper Brackets
- Fan Pully
- Handbrake connector
- Radiator brackets


Cat

Monday, February 19, 2007

Dash Customize


Going to convert the standard Dash into a Steel dash.

Something like these: http://www.mgnuts.com/mg/modsinterior/

- Strip Dash


Getting ready to weld up the dash


Bondo.


In primer.

Sunday, February 18, 2007

Manifold

Mainfold has been a broken ear in which the PO has welded on a stud.

Cut the stud off and trying to figure out the next step.
- Could purchase a c-clamp that is used instead of the stud
- Buy a used mainfold
- Mig welding won't bond to cast iron ( I think there is Nickel mig wire that would work)
- Going to use this on the mainfold.


Calyx http://www.calyxmanifold.com/
Bought a used mainfold.....

Monday, January 29, 2007

Steering Rack & Sway Bar

Clean & Disassemble Steering Rack
- Remove Outer Tie Rod's
- Remove Rubber Boots
- Remove Inner Tie Rod's by unpinning where the metal was punched down and spinning off with a pipe wrench
- Remove the plates over the pinon bearing & the bush holder on the side
- Remove the seal where the shaft enters the pinion
- Hammer the shaft (lightly) to remove the pinion bearing
- Pull the rack out.

Will replace the boots (torn), pinon oil seal, and the outer tie rods.
Bearings & bushings look fine.


Steering Rack


Inner Tie Rods
- These just screw on to the rack.
Notice there are several items that make up the inner tie rod.


Rack etc..


Pinion Bearing Removal


Blast & Powder Coat Steering Rack


Blast & Paint Sway Bar (& shock lever's)